Photos Before & After
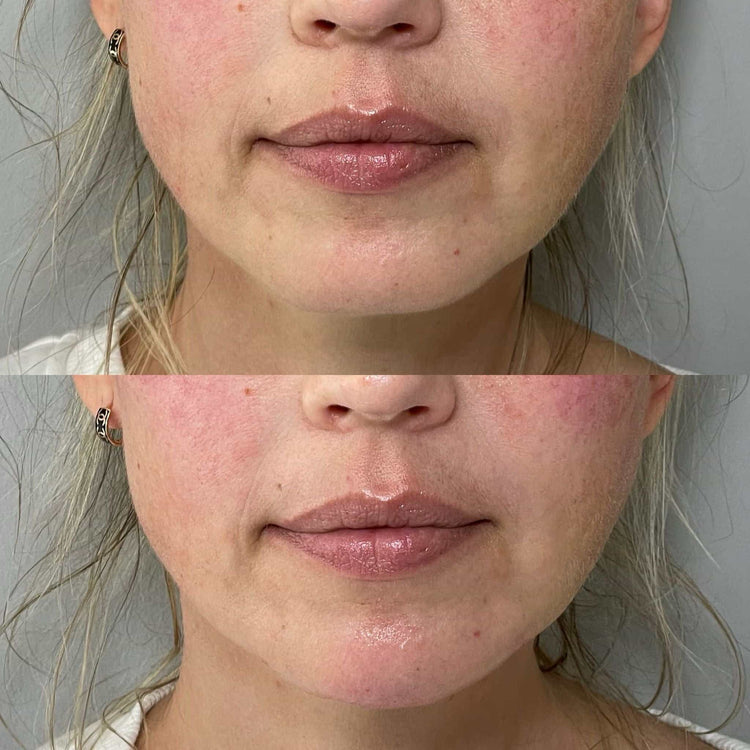
Before-and-after photos are crucial for evaluating the effectiveness of any cosmetic procedure, particularly chin crease treatments. They provide a visual representation of the changes made and allow you to assess the outcome accurately.
Here’s how to evaluate before-and-after photos for chin crease treatments:
- **Consider the Severity of the Chin Crease:** Look at how prominent the crease was in the “before” photo. A more significant crease may require multiple treatments or a different approach to achieve desired results.
- **Assess the Reduction in Creasing:** Examine the “after” photo and note how much the crease has diminished. Ideally, you should see a noticeable reduction in both depth and visibility.
- **Evaluate Symmetry:** Check if both sides of the chin appear symmetrical in both photos. Asymmetry can indicate uneven treatment or other underlying issues.
- **Look for Natural-Looking Results:** Avoid overly dramatic changes that may appear unnatural. The goal is to smooth the crease and enhance your natural features, not create a drastically different appearance.
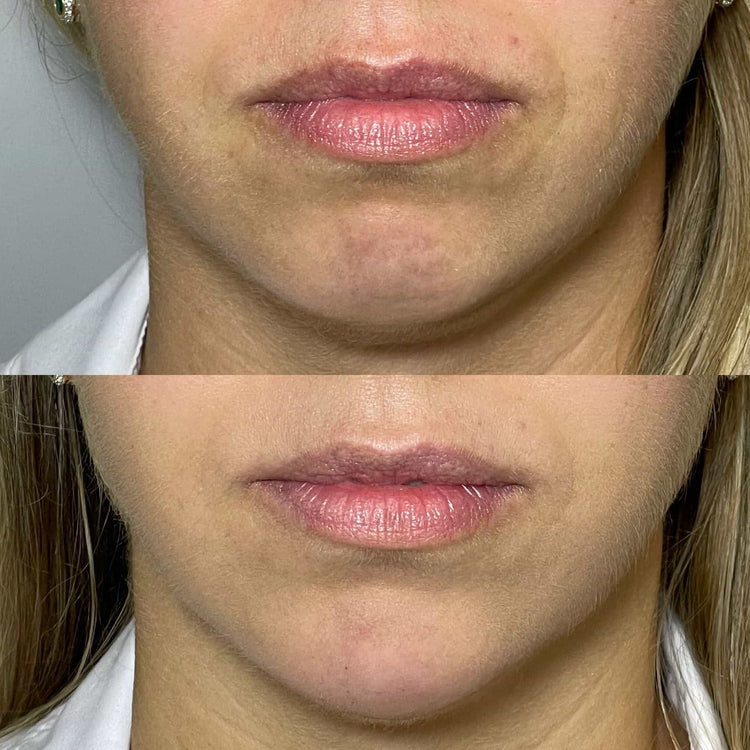
Selfie Comparisons
Before-and-after photos are essential for evaluating the success of chin crease treatments. They provide a clear visual comparison of the results achieved. When evaluating these photos, consider the severity of the crease in the “before” picture. A more pronounced crease may need multiple treatments or a different approach to achieve satisfactory outcomes. In the “after” photo, assess the reduction in creasing – there should be a noticeable decrease in both depth and visibility. Pay attention to symmetry, ensuring both sides of the chin appear balanced in both photos. Avoid choosing a treatment that results in overly dramatic changes; aim for natural-looking improvements that enhance your facial features.
Side-by-Side Comparisons
Before-and-after photos are crucial for evaluating the effectiveness of chin crease treatments.
They provide a visual representation of the changes made and allow you to assess the outcome accurately.
Consider the severity of the chin crease in the “before” photo. A more prominent crease may require multiple treatments or a different approach to achieve desired results.
Examine the “after” photo and note how much the crease has diminished. Ideally, you should see a noticeable reduction in both depth and visibility.
Check if both sides of the chin appear symmetrical in both photos. Asymmetry can indicate uneven treatment or other underlying issues.
Avoid overly dramatic changes that may appear unnatural. The goal is to smooth the crease and enhance your natural features, not create a drastically different appearance.
Angle Considerations
Before-and-after photos are crucial for evaluating the effectiveness of chin crease treatments. They provide a visual representation of the changes made and allow you to assess the outcome accurately.
When evaluating these photos, consider the severity of the crease in the “before” picture. A more pronounced crease may need multiple treatments or a different approach to achieve satisfactory outcomes. In the “after” photo, assess the reduction in creasing – there should be a noticeable decrease in both depth and visibility. Pay attention to symmetry, ensuring both sides of the chin appear balanced in both photos. Avoid choosing a treatment that results in overly dramatic changes; aim for natural-looking improvements that enhance your facial features.
Ruler or Tape Measure
Before-and-after photos are essential for evaluating the success of chin crease treatments.
They provide a clear visual comparison of the results achieved.
- Consider the severity of the crease in the “before” photo. A more pronounced crease may need multiple treatments or a different approach to achieve satisfactory outcomes.
- In the “after” photo, assess the reduction in creasing – there should be a noticeable decrease in both depth and visibility.
- Pay attention to symmetry, ensuring both sides of the chin appear balanced in both photos.
- Avoid choosing a treatment that results in overly dramatic changes; aim for natural-looking improvements that enhance your facial features.
Digital Image Analysis Software
Before-and-after photographs are essential for evaluating the success of chin crease treatments. They provide a clear visual comparison of the results achieved. When assessing these photos, consider the severity of the crease in the “before” image. A more pronounced crease may necessitate multiple treatments or a different approach to achieve satisfactory outcomes. In the “after” photograph, evaluate the reduction in creasing – there should be a noticeable decrease in both depth and visibility. Pay attention to symmetry, ensuring both sides of the chin appear balanced in both photos.
Aim for natural-looking improvements that enhance your facial features; avoid treatments that result in overly dramatic changes.
Subjective Feedback
Before-and-after photos are essential for evaluating the effectiveness of any cosmetic procedure, particularly when addressing chin creases.
They offer a visual representation of the transformations achieved, allowing for a clear assessment of the treatment’s impact.
Personal Observations
When evaluating before-and-after photos for chin crease treatments, focus on the degree to which the crease has diminished. Look for a noticeable reduction in both depth and visibility.
Also consider the symmetry of the results. Both sides of the chin should appear balanced in both photos.
Remember that natural-looking results are ideal. The goal is to smooth the crease and enhance your features, not create a drastically different appearance.
Feedback from Others
Before-and-after photographs are essential for evaluating the success of chin crease treatments. They provide a clear visual comparison of the results achieved.
When assessing these photos, consider several key factors:
- Severity of the Crease: Evaluate the prominence of the crease in the “before” photo. A deeper or more noticeable crease may require multiple treatments or a different approach to achieve desired outcomes.
- Reduction in Creasing: Examine the “after” photo and assess the reduction in creasing. Look for a noticeable decrease in both depth and visibility of the crease.
- Symmetry: Check if both sides of the chin appear symmetrical in both photos. Asymmetry can indicate uneven treatment or other underlying issues.
- Natural-Looking Results: Aim for results that look natural and enhance your features rather than creating a drastically different appearance.
Book your Labiomental Crease Filler consultation today with Dr. Laura Geige at It’s Me & You Clinic
- The Ultimate Guide To THC Soda Flavors And Ingredients - May 22, 2025
- NCTF 135 HA Near Rowledge, Surrey - May 22, 2025
- Tear Trough Filler – Under Eye Filler Near Titsey, Surrey - May 21, 2025